3 minute read

Text-based editing promises to introduce genuinely transformative editing workflows, making editing simpler, easier, and faster. Shiv Rajagopal looks at Adobe's implementation of the technology in Premiere Pro.
Editing technology is evolving at a tremendous pace. Developers are finding new ways to improve editing software, enabling a faster and more efficient workflow. One such example is the recent emergence of text-based editing workflows.
A text-based editing workflow allows editors to transcribe their footage and create an assembly and rough cut based on an automatically generated transcription. Traditionally, editors would have to scrub through the footage to find the best takes and edit points, a daunting and tedious task relegated to assistant editors. However, with a text-based workflow, an editor can re-arrange the words on a transcript, and software will reflect the changes on the video timeline.
This workflow style has been gaining popularity over the last year, recently culminating in Adobe releasing its own Text-Based Editing tools for Premiere Pro. In this article, we will look at the benefits of text-based editing and provide a basic guide on transcribing footage and using text-based editing tools for Premiere Pro.
The primary benefit of text-based editing is that it reduces the time editors spend on the assembly and rough cut. Instead of sitting through lengthy clips, they can just read the transcription to sort the good and bad takes. Once organized, they can use text-based editing again to cut and create the rough structure of the video.
This tool is handy for editors primarily working on long-form commercial content such as podcasts or interviews. Instead of watching and rewatching the footage for ideal cut points, editors can use the transcription to create their scenes, saving content creators time and money.
The first step of a text-based editing workflow on Premiere Pro is transcribing the footage.
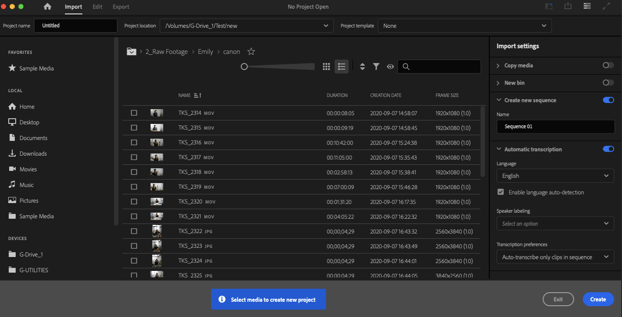
When creating a new project, Premiere Pro will allow you to import footage before creating the timeline. In this window, navigate to the right-hand side of the screen and enable Automatic Transcription. Select the language spoken so Premiere Pro can automatically transcribe the footage during import. Also, Premiere Pro’s software can identify and separate lines if there are multiple speakers, so choose the setting that best suits the project’s needs. Click Create to create a new sequence on Premiere Pro. Depending on the number of clips, size, and duration, this process might take some time, so be prepared to wait.
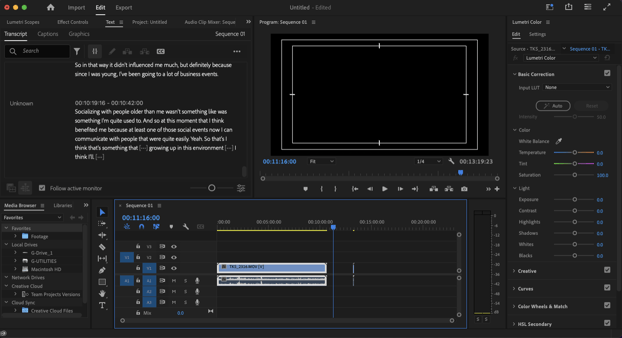
If most of the footage does not require transcription, import it as you normally would. Once the dialog clips are identified, navigate to the Text panel on the window's left side and click the Transcribe button. This will start the process, and the result will be the same.
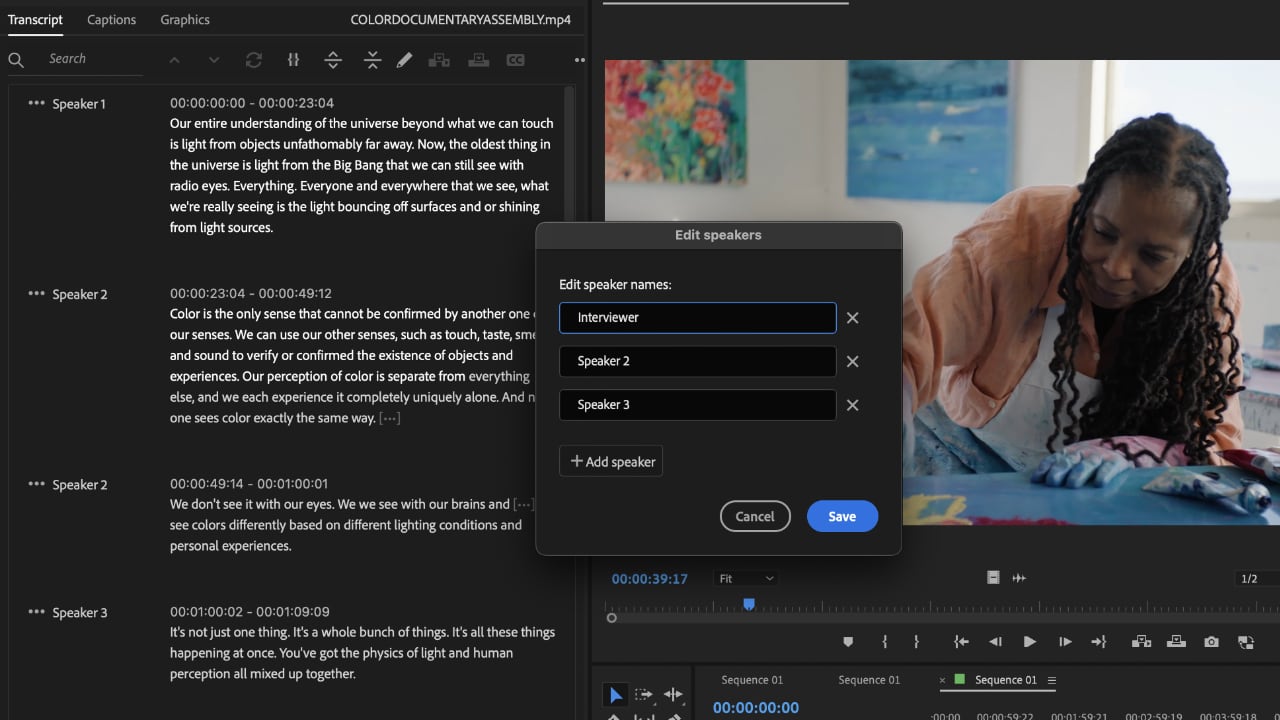
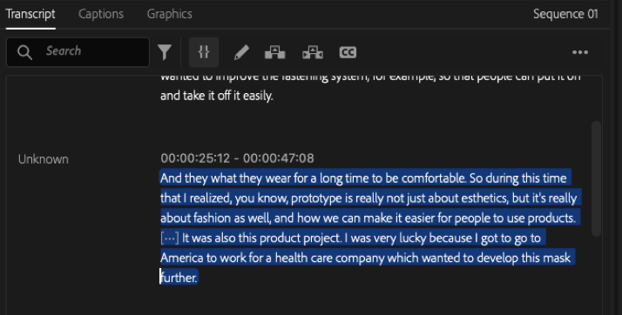
A vital step in this workflow is reviewing the transcription’s accuracy and making any necessary edits. Be sure to follow this step, as the automatic transcription will make mistakes depending on the speaker’s accent and overall sound recording quality. Click the Pencil Icon at the top of the Text panel to Edit Active Text and clean up any mistakes in the transcription.
To review and insert footage into the timeline, choose the Show Source Monitor Transcript. Select the relevant text and add the footage to the timeline using the Insert tool.
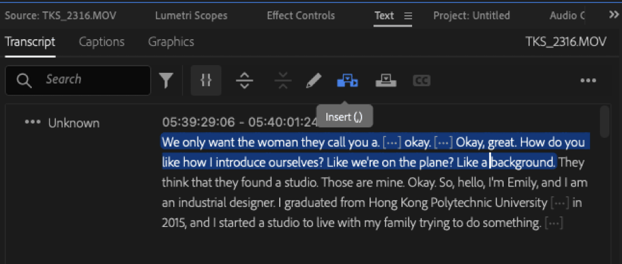
Use the Insert tool to add only the relevant sections of a clip instead of the whole clip. Be sure to select and insert clips in chronological order. This way, editors can seamlessly create an assembly cut without having to watch the footage multiple times.
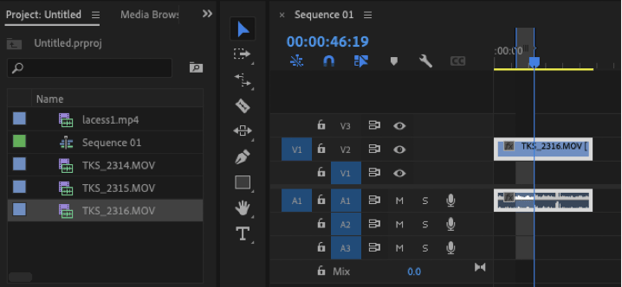
First, select the Show Program Monitor Transcript button on the bottom left of the Text panel. To edit the timeline, re-arrange the transcript using copy and paste. When a section of the transcript is highlighted, Premiere Pro highlights the section of the timeline. Users can then Lift, Extract, or rearrange the clip to their liking. Any edits made to the transcript are immediately reflected in the video timeline.
When users delete a chunk of text in the middle of the transcript, Premiere Pro cuts the footage and applies an automatic ripple edit in the timeline to ensure there are no blank frames. Since the text-based editing tools are on a panel, editors can easily switch to working directly on the timeline if they need to make any precise cuts or adjustments.
Finally, as Premiere Pro is already generating a transcript for text-based editing, creating captions and subtitles becomes much easier. Simply click the Captions icon on the top toolbar, and Premiere Pro will automatically generate and add captions to the video. Once again, the captions will appear on the timeline if any edits are required.
Text-based editing tools allow editors to assemble and create a rough cut more efficiently. The added advantage of generating and adding captions also makes creating subtitles easier. The current version of text-based editing is basic and straightforward, but first-time users will need some time to get acquainted with the controls.
Adobe also has a tool that automatically detects pauses or stuttering in the video and allows editors to delete these blemishes in bulk. This is an indication of how Adobe is bound to add more functionality to its text-based editing workflow as time goes on.
Tags: Text-Based Editing

RedShark 2020 @ All rights reserved.

Comments